The time has come to purchase your web hosting plan. Perhaps you’ve been referred to or read reviews and researched hosting providers yourself and have chosen Host Gator for their excellent pricing and reliability.
You’re now looking at the Host Gator hosting plans and do not know where to begin. In this article my mission is to walk you through the steps and provide guidance as to how to setup your hosting account with Host Gator.
If you are not there already, the first step is to head on over to one of the most reliable hosting providers on the net to get started.
You are now looking at the home page for HostGator.com. Your next step in choosing your hosting plan is to click on the Web Hosting link (circled in red below).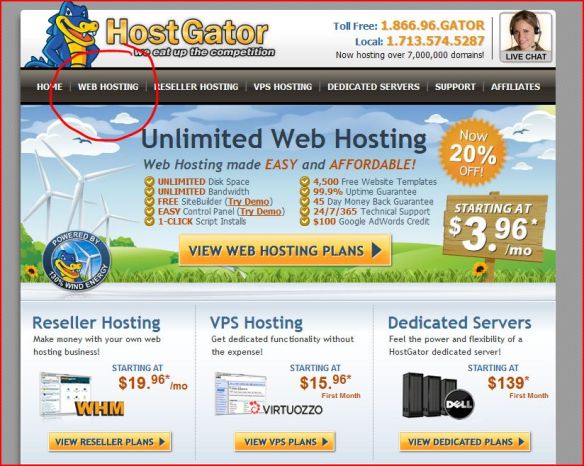
Click on Web Hosting (circled in red)
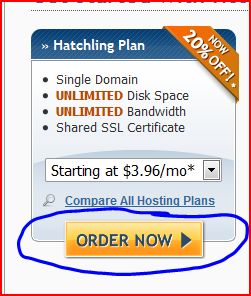 You will arrive at Host Gators hosting plan details page. Your task now becomes choosing the plan that is the best fit for you. In most cases the “Hatchling” plan is all that you’ll need. They all provide:
- Unlimited bandwidth
[bandwidth is data usage on your site. Every time a user visits your website, the server transmits data to their computer to display the page they wish to view. If they download something, that is data being transmitted and counts toward your bandwidth usage. Streaming videos, music etc all count toward bandwidth usage.] - Unlimited Disk Space
[this is an allotment of space on the hosting providers server assigned to your account. Imagine your computer has a 500gb (gigabyte) hard disk drive in it. You have 5 websites based off of that machine with an equal amount of disk space assigned to each site. That means each site has 100gb of data storage for their websites files. With unlimited, you need not worry about how much space you are using on their server for your website and its files.] - The big difference is what is included beyond that. How many domains you are allowed (web site addresses / url’s) whether an SSL certificate is included (secure your forms and the like from prowlers, good for e-commerce and overall privacy protection) and with the Business plan there is an included toll free number.
- You can compare the plans by clicking the Compare button to see a point form view of what the exact inclusions and differences of each plan might be. There is also a Live Chat agent available at the click of the mouse to help you in your decisions.
When you’ve made your selection for your chosen hosting plan you will be at the “Choose A Domain” screen. As you may guess, it’s time to enter your chosen domain name. A domain name should be something that is both easy to type in and easy to remember. It should also include some keywords to help your target audience find your website.
Don’t use http://www.niagarafallsarearestaurantsforfinedining.com it’s too long and too hard to enter, instead condense it and maybe be a little less focused on the exact location. Try http://www.niagarafinedining.com (probably already taken) instead. Now anyone looking for fine dining in the Niagara region will have a better chance of finding your website.
Enter your desired domain name and extension (.com, .net, .org). A .com extension is the norm and was originally intended for commercial base websites. .Net was for networking sites (websites allowing you to network with people) and .Org for Organizations.
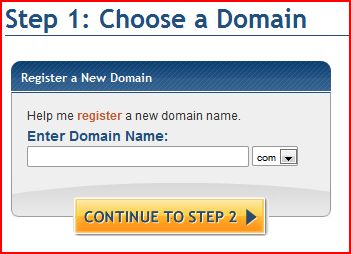
If you’ve already purchased your domain, enter it in the “I already have a domain” field.
Now it is time to setup your Billing Information.
- Select your package type (hatchling is the basic, baby is the basic + SSL and business is the basic +dedicated SLL and the toll free number)

- Also enter your billing cycle here. Savings come with longer terms but choose the term that you are most comfortable with.
- Now enter your desired user name as well as a security pin. This security pin is used in the identification process to prove you are you when you need to access your account again.

- Enter your billing information
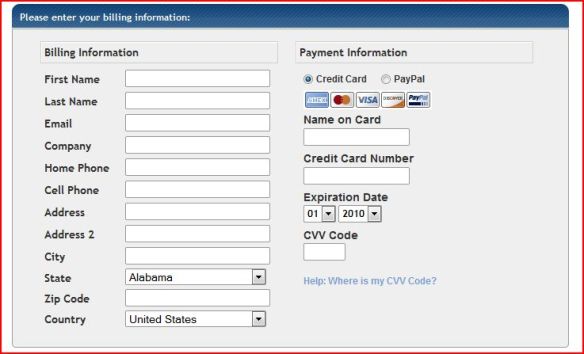
- Review the order details to make sure everything looks correct in terms of selections and pricing
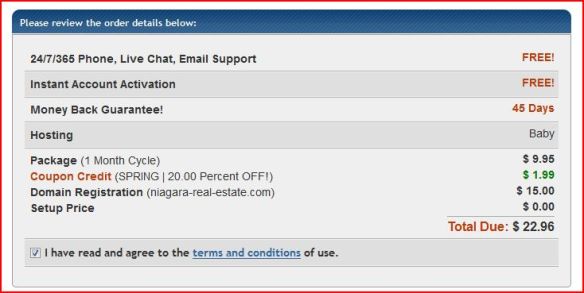
- If all is well it’s time to confirm your transaction

- You will receive email confirmation and be presented with a receipt on screen. Usually within a few hours you will receive some emails from Host Gator that contain important account information. Your web designer will need the c-panel access information as well as the FTP login details (ftp host address, username and password as well as if it is using sFTP or just regular ftp for the connection protocol).
Congratulations, you’ve made it! That wasn’t too bad now was it? Of all the hosting providers I have dealt with in my time, Host Gator’s setup process is one of the simplest I’ve seen. There are some out there with complicated and confusing steps an no explanation or line of help should you get stuck. My suggestion is simple, if you are setting up an account with another provider and are confused with no way of obtaining assistance, run.
I hope you found this information to be helpful and look forward to your feedback so that I may improve this guide over time.

You must be logged in to post a comment.